A Bit of Prototype Housekeeping
Milestone 4 ended with a grand accomplishment!
The core foundation of this project, a functioning conversation between the user and the LLM, was finally in place.
All that remained for Milestone 5 (the final milestone!) was to clean up a few key details:
For the first half of this milestone, I focused on the UI guardrails in that list. After the almost disastrous first attempt I had with them, I decided to proceed with caution by programming everything as simply and minimally as possible.
U and I
Do I Need Glasses or Is That Just Not Wrapped?
I began tentatively with the simplest task on the list: wrapping the text in the output box. In theory, this didn’t require me to rework any of my Blueprints, so it seemed the safest place to start.
After some tinkering with the settings in the Designer tab of my Widget Blueprint, I found the technical fix to enable text wrapping and adjust the output box based on its content.
For whatever reason, it wasn’t consistent when placed inside a Horizontal Box, the text wanted to stack vertically. The simplest solution was just to increase the size of the output box. This worked beautifully, and now Jenny’s responses could finally be read easily.

Enter Here!
Next, I tackled adding the Enter key as an alternative way to send the player’s input.
Up to this point, the only way to send a message was by manually moving the mouse to click the button.
This seemed like it should be simple, but it turned out to be a bit confusing. I dove into the Unreal documentation to find ideas on how to make it work.
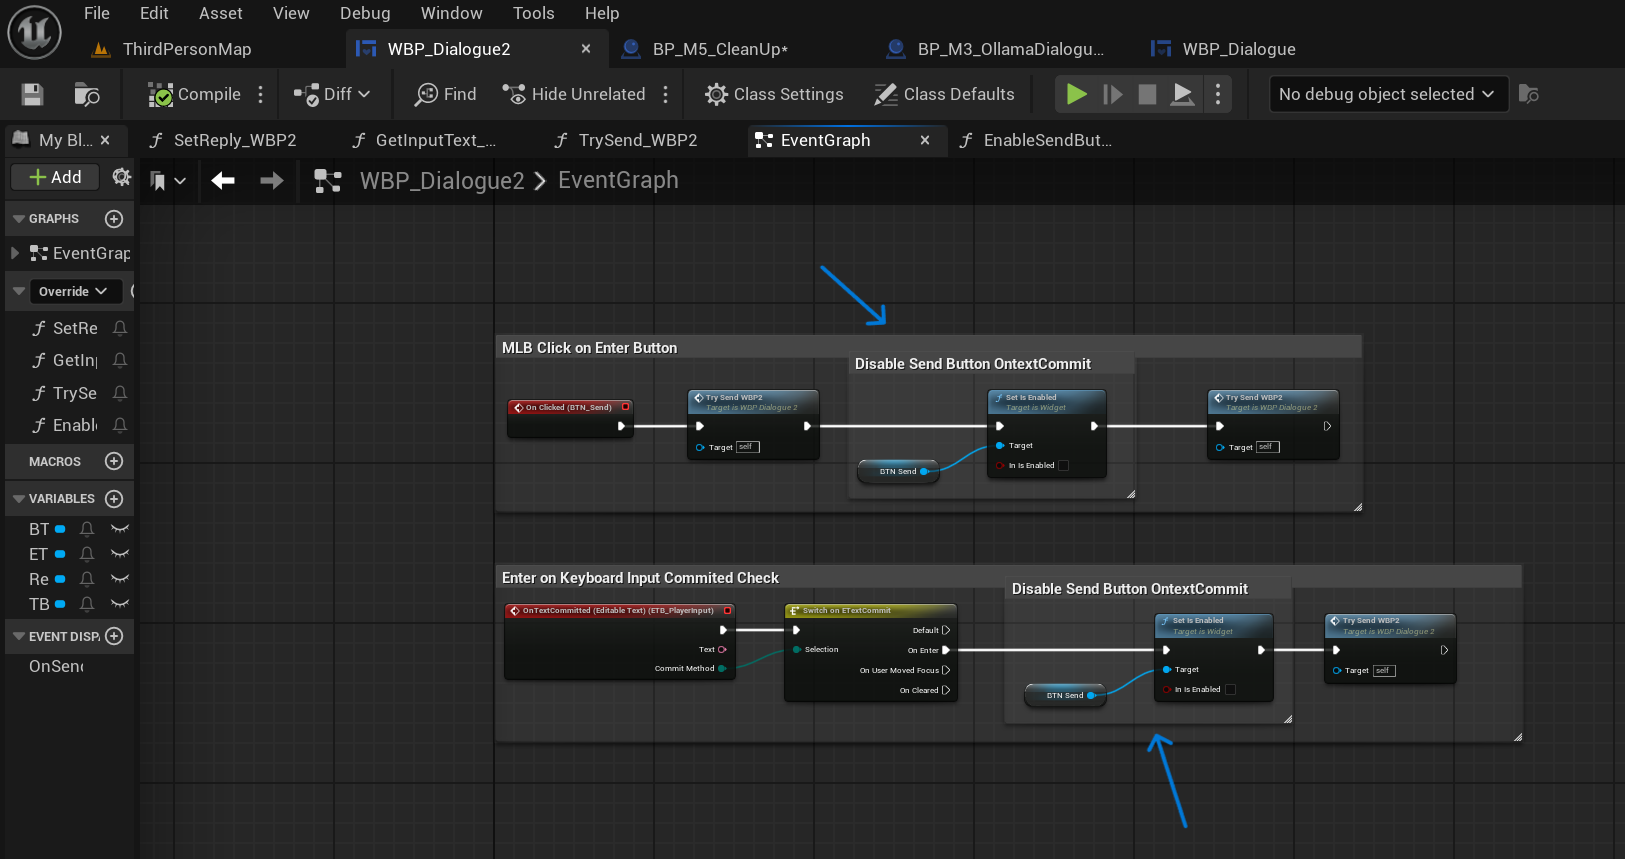
My Widget Blueprint’s Event Graph only had one event OnClicked which worked fine but was tied specifically to mouse input. I first tried wiring in an Equals (==) Commit Method (Enter) node there, but it didn’t quite fit and felt off.
In the Widget Designer tab, I noticed the Player Input Box had an OnTextCommitted event I could add to the Event Graph. I added it, tried the Equals (==) Commit Method again, and technically it worked…but the input was committing twice. I disconnected the original OnClicked node and tested again; this time it only fired once, but now only the Enter key worked.
After a bit more research, I found a Switch on ETextCommit node: a flow control node that determines how text was committed (e.g., via Enter key, focus loss, etc.) and routes logic accordingly.
To be honest, I’m not 100% sure I wired it perfectly, but when I connected that and re-enabled the OnClicked event… it worked on both click and Enter without duplicating the request.
I may revisit this later to see if there’s a cleaner way to do it, but for now, I’ll take it as a win.

One at a Time Please
Feeling awesome that my new guardrails hadn’t broken anything yet, I decided to dive into disabling the Send button! This idea came from feedback during my last peer presentation. It was advised that this was one of the most necessary UI safeguards to include for the final prototype.
So how to do this? I needed the button to disable after the player committed their input and re-enable once the LLM’s output returned.
Since this directly related to the UI, I figured the logic probably mostly live in the same Widget Blueprint I’d just been working in. I found a Set Is Enabled node and tried wiring it up. I hit Play and voilà! It disabled!
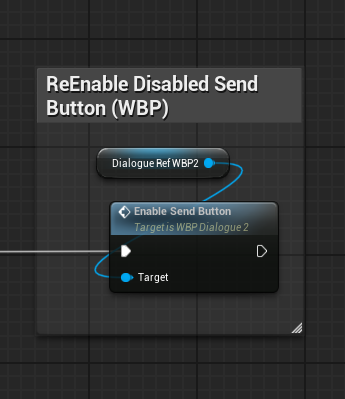
All that was left was re-enabling it again. I added a small custom function to check whether the Send button was enabled, then called it at the end of my main Blueprint after the entire input/output chain ran. It worked. Beautifully!
All Clear!
The last thing I wanted to add (and the one that made me the most nervous since my previous attempt at this guardrail went completely off the rails) was clearing the player’s text input field after the prompt was committed.
Using the same logic as the Send button enable/disable setup, I realized this might actually be simple. I just needed a node in my Blueprint that would empty the text string after it was committed.
In the documentation, I found a node called SetText (EditableText) and added it to the end of my Widget Blueprint’s Event Graph chain. I left the InText pin blank (so it would clear the text) and set the Target to = the Player Input Box.
I still can’t believe it, but it worked first try!
Looking Good
After completing all these steps I tested to ensure everything still worked, and it did!
As you can see:
- Jenny’s text box is now fully readable
- The input can be sent either with a mouse click or by pressing Enter
- The Send button disables and re-enables correctly
- The player input field clears after each prompt is sent
The Final Countdown
Next week marks the last week of this semester’s project. I’ll be focusing on the remaining tasks I mentioned earlier-specifically fixing the chat history memory issue and tightening up Jenny Applebaum’s persona for the prototype.
I can’t begin to describe how exciting it’s been developing this Intelligent NPC. I’m on the edge of my seat to see how Jenny will run in the end!
Until next time,
~Lauren