LET THERE BE LIGHT!
Up until this point in Discovery Park, the project has been focused on systems.
Everything was functional and working! However, visually, the world was still… blah.
Milestone 4 Week 7 was the moment the environment stopped being a prototype and started being a designed space.
This week was about learning how Unreal actually interprets a scene visually: how light behaves, how the camera sees it, and how small adjustments can dramatically change the readability of the world.
This has been a major gap in my Unreal Engine skill set for years. I could place a point light here and there, but to actually create a scene of vision through the powerful capabilities of Unreal Engine’s lighting? Seemed intimidating.
Heliocentrism!
Is the Sun Out?
Before adjusting anything, I needed to confirm the lighting pipeline itself was correct.
Unreal Engine 5 uses Lumen for real-time global illumination, which replaces the old baked-lighting workflows.
So the first step was verifying the project was actually configured correctly:
- Global Illumination → Lumen
- Reflections → Lumen
- Shadow Map Method → Virtual Shadow Maps
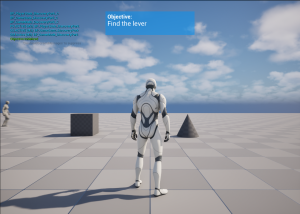
Then I ran a simple but powerful test: I rotated the Directional Light while the level was running and watched how the light bounced.
It bounced all over the place, cast shadows, and looked like an actual moving sun. That confirmed the entire scene was running on fully dynamic global illumination.
This meant that the Discovery Park lighting foundation was solid before my artistic lighting tuning began.

Grab Me My Sunnies!
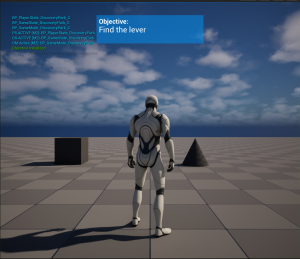
In almost every outdoor scene, lighting begins with one thing:
The sun.
In Unreal, that’s the Directional Light, and it becomes the scene’s primary key light.
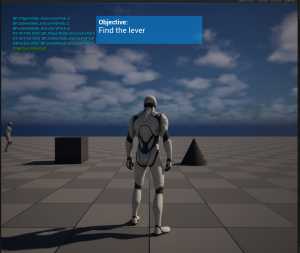
I enabled Atmosphere Sun Light and then rotated the light (quite a bit) until the shadows created intentional depth across the environment.
My final rotation ended up being:
Pitch: -40
Yaw: -105
This gave the scene a natural angled sunlight direction, similar to a mid or late afternoon, rather than flat top-down lighting.
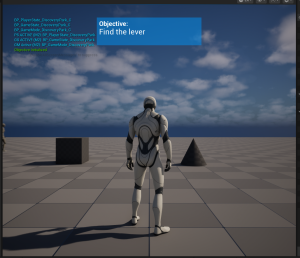
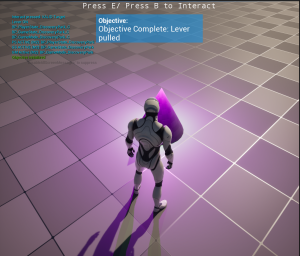
After setting the position, I needed to determine the intensity of the sunlight. The default Directional Light intensity was 6.0 lux, which produced blown highlights on Manny and flattened surface detail. So, after feeling my way up and down the intensity scale, I reduced it to 3.4 lux.
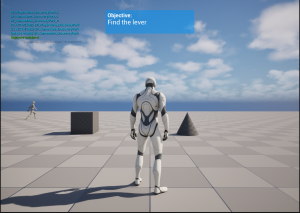
Finally, with light comes shadows, so I tuned Light Source Angle, which controls how soft those shadows appear.
This softened shadow edges just enough to look natural without losing definition.
At this point the scene finally had a clear primary light direction!

Filling the Darkness
Sunlight alone creates harsh contrast. That’s where the SkyLight comes in.
SkyLight provides ambient fill lighting, simulating how the sky bounces light back into the environment.
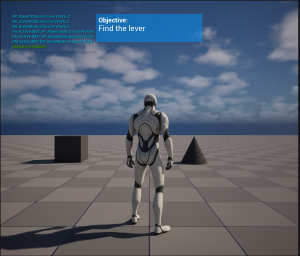
First I confirmed Real Time Capture was enabled so the SkyLight could respond dynamically to Lumen changes. Then I tested several intensity values (0.7, 1.0, 1.5).
Higher values brightened the entire scene and introduced cooler sky tones.
Lower values made the sun dominate and deepened shadow contrast.
After experimentation, the default value (1.0) turned out to be the most balanced. That kept shadows readable without flattening the lighting.
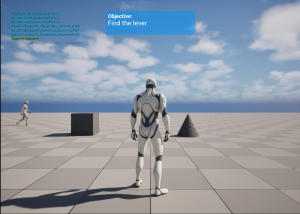
The sun and sky were now working together instead of fighting each other!
How Does the Camera See?
Even with correct lighting, Unreal still has one more layer that affects the final image:
Post-processing.
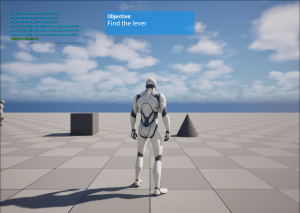
To control that layer, I added a PostProcessVolume and set it to Infinite Extent (Unbound) so it affects the entire scene. I also disabled automatic exposure adaptation.

Unreal automatically brightens or darkens scenes depending on what the camera sees, which can cause brightness pumping during gameplay.
So I needed to lock the exposure by setting both the MinEV100 and MaxEV100 to 0.
Then I tuned Exposure Compensation slightly, testing many different measurements and trying to see what felt right for the scene. I tested values ranging from -0.3 to 0.3. I needed the scene to have a subtle brightness lift without changing the physical lighting so the camera would see the world consistently.
My final selection ended up being 0.15.

Now a Little Color
Next I made small adjustments to the scene’s color interpretation. I didn’t want anything stylized, just a gentle calibration. To do this I needed to look at: contrast, saturation, and temperature. My final measurements felt right at these final numbers:

Saturation: 1.05
Temperature (lower = warmer and higher = cooler): 6700
Together these changes created a lighting feel closer to late-afternoon daylight, with slightly cooler tones and better surface definition.
Blooming into Glowing Lights
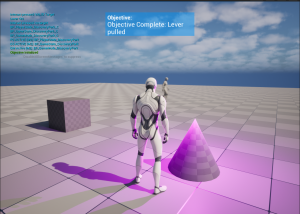
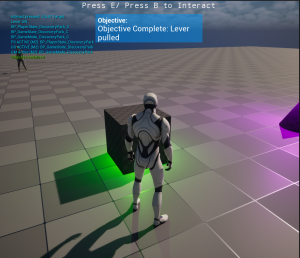
The final visual tweak involved Bloom, which simulates how cameras react to very bright light sources. This especially mattered for the purple lever light, which is an emissive interaction indicator. Choosing the correct value allows the light to glow naturally without turning into a blown-out white patch.
Like the other previous settings, I tested several bloom intensities (0.3-1.0):
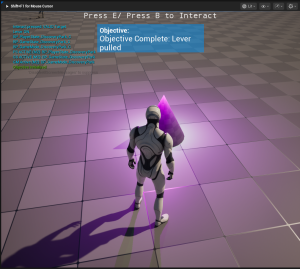
The final bloom value that looked best in the environment was 0.7.
Lighting is Not Just Exact Measurements, It is a Feeling
While working on this week I realized something important about lighting that I didn’t know before. Sure, lighting is complex and involves many “science-like” settings, specific tunings, and an understanding of visible spectrum physics.
However, in a gamespace, crafting an environment with lighting also requires trusting your design instinct.
You have to feel what looks right as well as know how to make that happen.
Light the Way Ahead!
Week 7 marks a shift from purely functional systems toward visual presentation.
Now that the lighting foundation is established, the next step in Milestone 4 is bringing the scene to life through cinematics using Sequencer and VFX.
Lighting sets the stage. Next week, the camera starts telling the story!
UNLESS YOUR PC BREAKS!!!
My precious PC, build by hand, beloved for many years…has suffered a Windows update bug that triggered after a hibernate session. Quite literally just unlucky.
The PC itself is technically fine (data is not corrupted, OS is fine, the computer works) but it appears the shell portion that communicates with the OS to, well, computer, has a corrupt file somewhere.
Upon manky command line attempts of fixing and finally resetting the PC, it is now stuck in a “boot loop” where basically cannot reboot itself back to a Windows state and loops around on the recovery screen.
I tried many things to fix it and though I did debug it, I had to admit I could use some help and brought it to a PC fix store. The repair is currently in-progress and its (hopeful) fix and return date will determine how far I get in completing Milestone 4, Week 8.
Wish me luck!!!
Until next time,
~Lauren